Tuesday, December 15, 2015

52" of Pretty

It's done. My first table runner made with 10/2 perle cotton using an overshot threading and a 2/2 twill treadling. 

Sounds like I know what I'm talking about, doesn't it?!  Ha!!  Fake it till you make it, baby!

Monday, December 14, 2015

Endings and Beginnings

I spent much of the weekend finishing (or almost finishing projects. One of the most interesting was finishing the fractal scarf. 

A few weeks ago I started an experiment with fractal spinning (http://www.knitnmore.blogspot.com/2015/11/spinning-fractally.html?m=1). I finally finished the fractal scarf and now you can see the effects of the spinning technique on the finished project. I'm loving it. 
Can you see how the frequency and patter of the stripes changes?  This photo makes it look like the scarf is fuzzy but the mats just the way the plying blended the colors. Interesting, no?

I also finished my spider-studied bobbin lace project. As expected, there are lots of errors but that's fine. 

Now that I have a feel for things, I can make it again and go for a usable piece. I had a lot of fun with it and the magic threads I used to start worked perfectly so that was a win. 

I've got the next project started but don't have all the bobbins worked in yet. More on that when I get it a little further on. 

Since I'd finished or got projects to a point that I would have to think too hard, I turned last night to a weaving project I've had in the loom since the Robin Spady workshop in the spring. I had a really long warp on the table loom and after I'd done the workshop and a couple of other projects, I decided to do a table runner using the overshot warp with a twill weft using the same thread. I don't always get these things right with weaving but I think I nailed this one. 


I only have about 8 inches more of usable warp left which will be about an hour's worth of work so I should be able to get it off the loom tonight. I love the pattern made by mixing the warp and weft styles.   

I'm not sure how long it will be but it should be at least 40-50 inches (I'm guessing since I didn't keep track). I'll have to see if some of the early part will need to be cut off. We'll know more tonight. 

Saturday, December 5, 2015

Memories

I'm going to a pot luck later and so I made this.
It's called Watergate Salad, presumably because it was served at the Watergate Hotel. I can't think of anything political about it. 

Anyway, I digress. My Grannie used to be one of the cooks at the Brownwood Hospital and in her day, people came to the hospital to eat (especially her hamburgers) even if they didn't have anyone there to visit. She made every type of jello salad there was and this is one of the ones I remember her for. 

It's dead easy. 
1 20oz can of crushed pineapple (her recipe said a #2 can)
1 package of pistachio instant pudding
1 1/2 cups mini marshmallows
1 cup thawed whipped cream (like cool whip)
1 cup chopped pecans

Mix everything together and chill. 

As I was mixing the pineapple and pudding mix, I had one of those scent memories and I was back in her kitchen watching her cook and having a good old natter. It was such a joyful memory that I wasn't expecting. 

Here's to my Grannie!

Now, if you'll excuse me, I have a spatula or two to lick.  Emmmm…clean. Wash.   

Thursday, December 3, 2015

Design Challenges

As you begin to design your own projects, the first thing to let go of is your pride.  I'm talking about pride in the sense that you can't admit a mistake and make it right.  Perfectionism.  It can sometimes be rooted in arrogance but I think it's more often rooted in lack of confidence.  It can't exist for a designer.

To design something, you may see it very clearly in your mind's eye or you may see as through a glass darkly.  Either way, it's always likely (to the point of being probable) that you are going to go down avenues that just don't work.  It just doesn't give you what you want so you have to back up, take stock and try another route.

As a very simplistic example, take my chunky & lace cowl.

I used a US size 4 needle for both the lace weight yarn and the  heavier yarn because it was a good size for the lace and it was okay for the other.  In fact, it worked great for the beginning section where I was alternating between the two yarns but as I began to work the solid section with the heavier yarn, I realized it wasn't working.  The fabric was way too thick and rigid.  

With the yarn that I'm using, it will felt naturally as the cowl is worn.  If it felted with the fabric as thick as it was, it would stand up all on it's own!  That's great if you're building a house.  You want your creation to stand on it's own if you're building a house.  When you're making a cowl, on the other hand, it's not the most desirable quality.  You want it to be soft and drapey, with plenty of give and stretch to it.

So I was here:
You can see that I'd worked a good 6 inches or so of the heavier yarn by the time I realized it wasn't right.  In fact, I kept knitting for quite a few rows after I knew it was wrong.  I'm still not sure why but this is where I ended up.  

I ripped back until I was almost back to the last lace panel, picked up the stitches with a US size 7 needle and started back.  Soooo much better and I'm so glad that I wasn't afraid of giving up the time I'd put into the project so I can end up with something I really like and that works from a design standpoint.

So now I'm back to here:
But now I can knit content.  

Before you ask, I did adjust the number of stitches to accommodate for the larger needles.  Three needle sizes would have made it way too large so I decreased about 16 stitches around (about 10% - there were 160 stitches in all).  This should bring it back into line to what it was although I may need to decrease a few more in the next few rounds.

A word to the wise, if you have to rip out a whole lot of rows/rounds, the best thing to do is roll the project up list you see here, take the needles out and then rip out your rows/rounds.  The reason this works so much better is that it keeps the fabric in control and so makes less mess with the open stitches.  If you just start ripping out willy nilly, you'll find that some stitches will ladder into lower rows/rounds and it will make the process of getting the stitches back on the needle that much more difficult. It's much more gentle on the fabric and the open stitches.

Friday, November 27, 2015

What to do with fractal spinning

I'm in the middle of an experiment with fractal spinning.  Check out this post for what that means, in case you missed it.  I finished the spinning last night and got the skein washed so it now looks like this:
Pretty but to me it's hard to tell any difference between this and any other plied yarn spun any other way.  Maybe after it's knitted, I'll be able to tell the difference.

So I started knitting.  Again, it's kind of hard to tell the difference but I like it nevertheless.

The scarf I started with it is 43 stitches wide and worked in a basket weave pattern.  Because knit stitches are wider than they are tall, I made the stitch pattern 5 stitches wide and 6 rows long.  In case you'd like to knit yourself (or someone else) an interesting scarf, you don't need fractal spun yarn, any good sport to DK weight will do.  I'm using US size 4 needles because my yarn has thicker sections and thinner sections.  For my yarn, these create a nice fabric.

I casted on 40 stitches and worked knit 2, purl 2 ribbing for about 8 rows before I started the pattern.  On the first row of the pattern stitch, I increased 3 stitches across to end up with 43 stitches.

Pattern stitch
Row 1: K2, P2, (K5, P5) repeat bracketed stitches to last 4 stitches, P2, K2
Row 2: P2, K2, (P5, K5) repeat bracket stitches to last 4 stitches, K2, P2

Repeat Rows 1 & 2 twice more

Row 7: P2, K2, (P5, K5) repeat bracket stitches to last 4 stitches, K2, P2
Row 8: K2, P2, (K5, P5) repeat bracketed stitches to last 4 stitches, P2, K2

Repeat Rows 7 & 8 twice more

Repeat these 2 sections until your scarf is the length you desire (or your yarn is almost finished) and end with 8 rows of K2/P2 ribbing.  You'll need to decrease 3 stitches on your last pattern row.

Once its washed and blocked, you'll be able to see the basket weave pattern much more clearly but even if you don't block it, I think it's still got an interesting light texture.

I'm not sure how much yarn I ended up with so I'm not sure how long the scarf will be but I don't think it will be very long.  I think this pattern would work really at any length but I think it would be best as a short or medium length.

Wednesday, November 25, 2015

Trial and Error

Sometimes you just have to keep trying until something works.  That's been especially true with the edging for the poncho.  I don't think I've ever had such a time with a design.

I started the edging with an I-cord that was supposed to be the outside edging but as I worked it, I realized that it was pulling in on that side so that would need to be the side attached to the body.  Fine, no problem.  That would give a nice flow from the body to the edging.

I did a light block on the body and as I worked the edging, I would lay the edging around to see how close I was to getting it long enough.  When I got close to what I thought was the finish, I started attaching the edging to the body so I could knit to the very end and have a nice tight finish.  But when I  got to the end of the edging, it looked like it was way short.  What?!

I thought the edging I had should have fit almost all the way around but I kept knitting, adding another 8 inches or so until it went all the way around.  Great, right?  Well, great until I tried it on and found that the edging was all wavy.  Arghhhhh!!!!!

I then had to take the edging completely off (about 110 inches of edging, by the way) and re-attach with better spacing.  Once I did that, I then had to rip out about 6 inches of the edging that I'd knit before, taking into account that I needed to make the braid from the beginning flow into the braid at the end.

Done.

Good.  Now I needed to figure out what to do with the outside edge to finish it off.  It was really rough so I decided to crochet around the edge to give it a little form but it needed something else.  I only had part of one skein of yarn left so I had to be a little careful.  As an old crocheter, if all else fails, use a shell stitch.  So that's what I did and it worked perfectly.  Here's the final product that is worth all the hassle of making sure it was right in the end.

 
Of course, it ain't over till the blocking's done.  Sometimes it makes all the difference.

It ended up being the perfect length and the perfect circumference.  Some of that was guess work and some of that was experience and some of that was pure old trial and error.

Monday, November 23, 2015

Spinning Fractally

I've had a fascination with fractal spinning since I first heard about it.  The idea is that you can prepare your dyed fiber in such a way as to create different lengths of color repeats that create interesting effects when plied together.  The fascination is in the mystery of the math, I suppose, in the way a mathematical idiot is drawn in by the magic of the unknowable.

What??!

Let me 'splain.

If you have a length of dyed roving, you can split it in half.
 
Half will be spun in one long piece, making the section of each color very, very long indeed.
 
The other half can be done in different ways from what I've seen.  The way I did it is to split the second half in half and then half of that in half again.  I started spinning with the smallest strips and then the wider strip and then the wider strip.  So there was a 1/2, a 1/4, a 1/8 and 2 - 1/16 size strips.  I started with the 1/16 strips and worked my way up.


My first bobbin was the many strips with longer and longer color repeats.  The second bobbin will be the first half strip with its long repeats and then I'll ply the 2 bobbins together. 

I have no idea how it will turn out but we'll find out soon.

If you want more information about fractal spinning, see the blog post from Roving Crafters here
 

Wednesday, November 18, 2015

Quick update

I did a quick measure of the circumference of my poncho and I'm going to need, roughly, 110 inches (9 ft 2 in) of edging. 

I've done 16 inches. I have 3 full skeins and still probably a third of the one I'm working on. I actually feel much better now about having enough to finish. 

Wait. Forget I said that. 

By the way, for an easy way to measure things like this, I took a ball of linen yarn (so it won't be stretchy) and traced around the outside of my poncho. At the end I cut it off and then I measured the string with my metal tape measure (again so I don't have any stretch). 

Now I have the yarn to keep with my edging to measure against. I haven't fully blocked the poncho but at least this will get me close and I'll finish the edging once it's been mostly attached so that it lays right. 

Monday, November 16, 2015

The Edging (dum, dum, duuuuummmm)

I've made some progress on the braided cable poncho.
Front:
With its giant 15-stitch braid.
And the Back:
With its braided motif. The cable around the neckline is knitted but not yet stitches down, in case it doesn't look right to you.  It's not right yet but it will be.

Looks pretty far along, right?

It's actually not so far as you'd think because there is still The Edging. 

Anyone who has knitted an edging around a shawl or doily or any other article will understand the physical and psychological blow The Edging inflicts. 

You've got this whole garment which has many, many stitches and has used much yarn. In my example here, I've used 8 1/2 balls of yarn. That's over 1,000 yards of yarn. If you were a newby, you'd be thinking, "I've got this.  This is easy. Almost done."

But I am not a newby and I know that, even though my edging is narrow, the 3 1/2 balls I have left to make this edging may very well not be enough to go around the entire circumference of the poncho. 
It's just a few innocent stitches of background, a narrow i-cord to make a nice, finished edge and a simple little 6-stitch braided cable. What could be easier?

So the question to be answered is, "Will 427 yards of yarn be enough."  At this stage, it's anybody's guess. Stay tuned as the adventure continues. 


Saturday, November 14, 2015

Figuring stuff out

I've got to the back of my braided cable poncho and started the Celtic knit motif.
I found a photo when I was searching for a pattern and this is my attempt to recreate it.
I'm about halfway through the pattern and I think it's going to work out. Sometimes these things are a little trial and error but so far so good. I don't want to but I can rip out with the best. Lots of practice, me. 😉

I was going to have the back straight across but I've decided to make the point to match the front. The decision is purely practical - I don't know if I'll have enough yarn otherwise. I still need to make the border and certainly don't want to run out of yarn on that section. Being last year's purchase, I'm pretty sure I'd never find another skein in this batch. 

I'm off to finish another row or two…

Friday, November 6, 2015

Braids galore

I've started work on my first personal knitted item in quite a while. I've been tied up preparing and conducting classes and so haven't had much to share (except that in pulling material for my cotton spinning class, I found my long last tahkli spindle - yea!!). What spinning I've been doing has been for gifts that I don't want to post for fear the recipient will see it. So that's left me very little to post.

Now, however, I've got a really fun design project going on. It's a cabled poncho that is going to have a pointed front and a square or rounded back (haven't made up my mind just yet on that part. 
It will also have a wide-ish cabled edging around the outside to finish it off. 
I've used the chunky braided cable up the middle and a narrower stepped braided cable up either side of the middle braid. 
I am really pleased with the way it's laying out. 

This is actually the second version. I got about halfway to this size with my initial attempt and didn't like it at all. It didn't lay right and I just wasn't happy so out it all came and, using lessons learned, I came up with this. 

If you're wondering about the safety pin, I'm using it to keep track of which side of my braided cable I'm twisting. 

Monday, October 19, 2015

Finishing off

I've been working almost non-stop trying to get some baby things done for an old friend of mine. It's more knitting than I've done for ages but I'm thrilled with how they've come out. I won't post pics until I've given them to the parents but I will show you this:
One of the items just seemed unfinished and I couldn't figure out what it needed until I remembered this little lace edging that I'd done as parting my study course and realized it was perfect for this item. It's only about 1/2 inch wide and just perfect for this item. 

While I can't show it yet, suffice to say there will be some edging and some gathering and some rosette-ing going on. Still need about another foot but it goes quite quickly so shouldn't take too long. 

Lace makes everything g better!

Monday, August 31, 2015

All about the baby

People who work with me know that every baby gets something hand-knitted. The size or elaborateness is usually commiserate with how well I know the person. I always ask if they have something in mind (for one Christmas baby it was a little elf onsie costume with a pointy hat and boots with bells on the toes - so cute and what she dressed the baby in for Christmas Eve) but otherwise I get my choice. 

There is an upcoming baby for someone I worked with at a previous job who I like very very much and whose husband works at my current place of employment. It's her first and we know it's a girl and she wants pink and frilly and girly. So fun to knit a pink frilly girly something. 

And this is the something. 
It will be a blanket using the feather and fan stitch, one of the oldest recorded knit patterns and as frilly as they come!!

I'll also be doing a pink fluffy housecoat to go with it so I hope that will be pink and frilly and girly enough for her!

Sunday, August 23, 2015

Rounding out the chapter

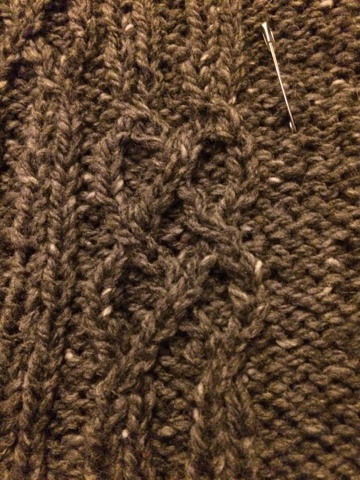
Just to round out the projects in chapter 2, these are the last 2 projects. I love the braid of the last one (the gold one) although it was a little tricky to move around the elements. 

In fact I made a booboo on the end of one of the trails but was too far down the road to go back and fix it. If it had been an actual project, I would have but it was fine for the sample. I would like to do a table runner using this edging. 

Put it in the list…

Wednesday, August 19, 2015

Success as a ratio, not an absolute

When the L.A.C.E. Group started their yardage club (you gain entry by working at least 2 yards of lace at the skill level you are able to work), I started a very simple, beginner lace piece because I was a beginner. There were some really basic things I was still not fluent with. After I'd worked about 2 feet of that edging, things clicked for me and I reached a new level of understanding of the craft. It was one of those moments when I realized that all of a sudden my hands were working stitches without my having to think through every movement and it was such a moment of freedom and triumph. It gave me courage to try something a little harder and a little more complicated.

That edging was, for the most part, completed back in 2012 but since the. I've continued to progress and try new things. Some of them worked and some of them didn't but I'm okay with that. I'm happy for success to be a ratio rather than an absolute. It's way more fun and exciting and fulfilling that way. 

This most recent project of working through this Torchon workbook has been just such another adventure. I'm gaining real fluency with moving from element to element and it's a freeing feeling. 

I was thinking the other day that lace is very much like snooker or pool. With each move you have to think about where each pair lands in the work so that it's in the right place to move to the next step. I'm finally starting to be able to see where the pairs need to be and why. 

That said, I have just 2 more samples to work to finish the second chapter - grounds- before I move on to spiders then Scansanavuan holes and then rose ground. One sample is ready to turn the corner and there's one more after that. 
Here are the last few samples that I completed. 
But I'm done for tonight and will be ready to work a few stitches before work tomorrow. Onwards and upwards!

Tuesday, August 11, 2015

Spinnin' Fool

I've had several spinning projects hanging around for several months. They're mostly well behaved but the last couple of weeks they've begun to mock me and have gotten gradually more irritating. So, for the peace of the house, I've been getting them cleared out.

I showed the 2 oz of lace weight that I finished up last week. That was fiber left over from a project that is now hanging out at the State Fair waiting for the judging to begin. I had another bunch of leftovers from that project, a silk/merino/angora blend that was probably just under 2oz. As with the other batch, I wanted to see how finely I could spin this. With the silk content helping, I discovered it was very fine indeed. I need to weigh the final skein but I ended up with more than 300 yds (before washing - probably around 270 after washing) of gorgeous bouncy fine lace weight yarn. 
Scrumptious!

What am I going to do with it?  It's going into a very special place in my stash reserved for the specialty lace weights in white that I've spin over the years. I have plans for a "white on white" project using these in their various shades of glorious whiteness. 

The other finished project?
Plump and squishy. Not sure yet but about 450 yards of heavy worsted softness. Probably a hat and mittens?  We'll see what the yarn decides to be. 

Tuesday, July 28, 2015

What's next?

I've now finished the samples for section 1 of my workbook (clothwork). It's just my style that the book says the last sample (the one on the left) "presents more difficulties than 1.3 (the one on the right) and success may not be immediate!"  Of course the one I had difficulty with was 1.3 and I completely sailed through the last one. 
These are the last 2 samples.  The one on the right is my favorite so far and one that I will definitely go back to. The one on the left is one that I think would work great as a scarf. Just blow up the pattern and use a nice silk or cotton yarn and you've got something really interesting. 

On to the next section - Torchon Ground. 

Saturday, July 25, 2015

Leftovers

Sometimes leftovers are the best part. When I spun the yarn for my #Roseroot shawlette, I had 2.1 ounces (61 grams) of the merino/cashmere fiber left over. I wasn't really sure what to do with it.

I figured that if I spun it very light lace weight, at least that would give me the most yarn to work with. 

I spun and I spun and I spun until I wound up with this.
Then I plied and I plied and I got this. 
The thing with spinning with a fine wool like merino is that it's super crimpy. That means that, while I ended up with 406 yards of finished plied yarn, after it was washed and dried, it came to 377 yards of finished yarn (2,872 yds/lb). 

Not knowing that got me into trouble a few times when I thought I had plenty of yarn for a project only to end up short 
If I hadn't gotten bored, I probably could have gotten even more yardage but I'm happy with how it turned out. 

Now what to do with it…

Monday, July 20, 2015

Cracked it!!

As I was trying to figure out what had gone wrong on my practice piece, I kept thinking of my Grannie who would be on round 82 of a crocheted doily or tablecloth and I could see her counting. Somehow something hadn't fitted and she was determined to figure it out. She would count back round by round until she found it and even if it was in round 3, she would rip back to make it right. 

I used to tease her about it, first asking how she could have missed the mistake through 79 rounds and then telling her no one would know and she should just fudge it. She would frown at me and shake her head. "I would know it wasn't right."  And she would continue to rip and rip until she had it right. 

That's how I've felt tonight. Not the part about knowing there was a mistake because anyone could see it wasn't right, but the ripping out to almost the beginning because that's where my mistake was - on the 2nd pin of the piece. But as soon as I took it out and did that one thing right, everything else fell exactly into place. 


I'm sure there's a lesson there somewhere. 😳

Sunday, July 19, 2015

Moving along

The good thing about the hot temps is that it's easy to justify staying in the house and working on my lace projects.

Exercise 5 and 6:
One of the most challenging things about lace is learning how to move from one element to the next, making sure that all the bobbins are in the right place ready for the next element. 

It's kind of like a good pool or snooker player. They hit each ball while in their head placing the cue ball in the right place not just for the next shot but several shots down the line. 

My problem is sometimes my mind is away with the fairies and I'm not paying attention to what's coming up. But they say practice make perfect so I just keep practicing. 

I really like this little edging. 
It would be lovely on a baby' garment. Very sweet and dainty. 

The corner makes a very tidy turn by switching out the worker pair with the next pair in line. By doing this it saves the pucker that would happen if you tried to work through all the passives with the same worker. 

I remember seeing this with another pattern but I'd forgotten about it. Very nice, elegant solution.

Saturday, July 18, 2015

Torchon practice

Finished exercise #3 and, sure enough, the first section looks pretty bad but once you get past that, it's not so bad. The edges are pretty good and the centers are good. 
I thought that using the 2 colors was a mistake but it's actually not too bad with the colors that I used. It gives a little bit of interest. 

I think if I was using this as an insert in a garment (as opposed to something that was going to be framed), I think I would do something like this with close colors to make it seem less flat. 

It's been fun playing with the colors. 

Wednesday, July 8, 2015

This makes me happy

I finished my #roserootmkal shawlette made with handspun Merino/cashmere yarn. 
There were a few adventures with it. I ran out of yarn 1/2 way thru the edging (which I expected).  I had spun the main yarn knowing that I didn't quite have the yardage I would need. That was one reason I decided to make the full shawl with the red (of which I had plenty) and the smaller version with this. I'm glad I did because I wouldn't have had enough fiber to spin for the whole shawl. 

What I didn't expect was to run out again about 2 inches from the end. I can't say how many times I've eked out a project, sometimes with just inches of yarn left. No such luck this time. Guess this is the evening up of all those close wins!

But I made the mistake of trying to spin the last bit of yarn while watching the #Hobbit Battle of the 5 Armies. I may have gotten a wee bit too much twist in as I treadled to the battle and washed the yarn in my tears at the end.  But I got it done and am thrilled with it. It's just the right length you would want for a shawlette but I still need to block it. 

But since we're supposed to have a high today of 68 degrees (in the middle of July - what?!?) I was able to wear it and bask in its coziness and softiness. 
Want one of your own?  You can find the pattern here: 
http://www.ravelry.com/patterns/library/roseroot-2. Thanks for the beautiful pattern, Rohn!

Saturday, July 4, 2015

Only one thing

Yesterday I was off and did absolutely nothing except one thing. 

This. 

Before yesterday I was on the 3rd diamond of this Torchon and rose ground sampler. Yesterday I entered the zone. Other than fixing one meal and bathroom breaks, I worked from 9am to 11pm on it. 

People sometimes ask me how long a project took me to finish and I can rarely answer vet definitively. This time I have a better idea. I would say this one took approximately 24 hours of work.  
Now onto everything else left on my "to do" list. 

Saturday, June 20, 2015

Hello. My name is…

And I think I may have a problem. 

In my small living room I have this…
And this…
And this…
All projects started and advancing. 

The first is the restart of the sampler that I  just spent quite a time practicing on. Gold thread this time to match a knitted doily made out of the same thread

They'll look nice hanging together. 

The second is the edging started on my new pillow and getting along nicely. It's a simple pattern that provides a little rest to the mind while still feeding the soul. 

And the third is a pattern I designed myself to fit into a special antique frame. I thought I might do it in colored threads but after a little testing last night, I've decided to do it all in a white linen thread.   Just need to wind the bobbins and get started on the outside edge tonight while I'm watching the Hobbit: the Desolation of Smaug. 

And now I've used the whole morning with these projects which leaves me this afternoon to mow the yards and clean the shed. Somehow I think I've made an error in tactic. I'm off to sweat for the good of my soul. 


Thursday, June 18, 2015

Failure has to be an option

If we're ever to learn anything new, we have to be willing to try and fail and then try again and fail but maybe not suck quite as much as the first time. Rinse. Repeat. 

One of the biggest thing I see when I teach classes is how uptight people get when they're trying to learn a new skill or a new technique. They often get so bogged down in the mistakes that they actually lose the ability to make progress. 

I know where this comes from but I'm still going to ask the question. Why do we have to be perfect with everything all the time?  

Learning is at the heart of it about experimentation and exploration. Creativity is about the big "What If."

I'm sharing this post about my latest finished lace project simply for the reason that it's riddled with mistakes. Sharing it is part of living what I preach to my students. Mistakes don't matter nearly as much as what you learn in the process. 

My last few projects have been chosen for the simple reason that there are techniques I want to learn to do well. For that to happen, I have to commit to failure being an option. At least for a while. With the right mindset, allowing myself to not be perfect gives me another tool in my belt. I can enjoy the process without the pressure. Out of that I get 2 things:

1.  I get to enjoy the process. 
2.  I learn new skills that I can put to use. 

Win/win!

Looks okay from a distance on a small screen but believe me, there are a ton of errors. I'm going to keep this piece and give it pride of place so it can remind me to take time to do things that are beyond my skill level or that I don't know how to do. 

Time to get the bobbins wound to do it again.  

Sunday, June 14, 2015

So grateful

 Sometimes I forget to slow down enough to realize how blessed I am to have the ability to follow my passion with textile arts.  I've had amazing people in my life to open doors of knowledge and experience and those to share the journey and I've had the means to obtain the tools and supplies to do such a wide variety of things.

With that I've tried to be as generous as I can with others; certainly so many others have been generous with me. And there's no group I know as generous as textile artists. 

I had a great time with the L.A.C.E. Group in Chicago yesterday for their Lace Day. I did more than my fair share to support the vendors and got to spend some time with 3 ladies who were in the middle of learning to needle tat when the person working with them had to go take care of something.  Hopefully they'll also be able to take a road trip to join us in Springfield for the Needle In a Haystack event.

My best purchase was a new pillow. Two years ago at the last Lace Day, there was a vendor with beautiful hand made roller pillows. I was so hoping they would be there yesterday and sure enough they were!  Here's my new baby - an Alan Frederickson bobbin lace roller pillow. 

It even has a nice little spring loaded catch on the drawer in the front.
 
And I've even got a new project on it. 
And today I got to spend some time with my old knitting buddies to share a little bit about bobbin lace. Such a good group and it was nice to be back with them. 

#iamblessed