Showing posts with label scarf. Show all posts

Tuesday, January 6, 2015

Best of the best

Here we are in Illinois in January. Although we only got a dusting of snow, the polar cold is moving in. I just heard on the radio that our average temp for all of 2014 was 49.9 degrees F. 

The serious cold moves in tonight and for the rest of the week we're expecting wind chills in excess of -20F. 

With that in mind, I've decided the best article if clothing I've ever made in my whole life is...my Doctor Who scarf. 
All 12 feet long and 8" wide of it. The yarn (Cascade Pacific) is soft but has some substance to it and it's long enough to wrap around 3 times and still have tails long enough to cover my front. 

I had a friend who years ago defined the criteria I still use for a proper mug. She called the 3 finger test. If you couldn't comfortably fit at least 3 fingers through the handle, it didn't qualify. 

I now have a new criteria for the perfect scarf and this Doctor Who scarf is the criteria against which all winter scarves will be judged against. Forever. Period. 

Want to make your own?  If you can form a knit stitch, you can do it because it's garter stitch from start to finish. www.doctorwhoscarf.com

And if you don't know who Doctor Who is and why the scarf matters?  www.bbcamerica.com/doctor-who

The scarf belongs to the 4th doctor played by Tom Baker and you can see episodes (both the original and the modern day versions) on Netflix. He was my first doctor back in the 70s so that makes the scarf even better (as if it needed help :-) ). 

So if you live in a cold climate it if you're just cool, you need your own Scarf. 

Monday, December 29, 2014

Third time charming

The third Doctor Who scarf really is charming. I have to say, knitting 3 Doctor Who scarves in about 5 weeks was a little over the top but I know the kids loved theirs and I definitely love mine. 

Theirs were knit with the most accurate colors I could lay my hands on in 100% acrylic so easy wash and easy dry for Mom.  (www.doctorwhoscarf.com has everything you need to know if you want to make yours)

Mine, however, was knit with Cascade Pacific, 40% super wash Merino/60% acrylic, in the colors most closely related to the proper colors. It's not really that close but they were what was on hand at Knitorious in St Louis. 

(This pic doesn't really show the colors very well.)

I probably never would have used this yarn had it not been for this project but I really enjoyed knitting with it and the Merino gives it enough softness that I'm seriously considering it for a new sweater. 213 yards in the skein so you could definitely do something cool for a reasonable price. 

It would be a perfect pick for a modern take on a fair isle pattern. 

Sunday, September 28, 2014

Better late

About 4-5 years ago I spun a lace weight yarn out of some blue faced Leicester wool dyed by Frabjous Fibers, my favorite all time dye house. The colorway was called English Garden and it was easy to see why. 

I started a project with it but it was another one of those situations where the yarn had an opinion and the project never went anywhere. 

About a year ago I ripped out and started a new project. Even though it's taken me all this time, I should get credit for perseverance, if not for speed, because I've finally finished. 


I was running really short on yardage
(That's how much I had left in the end) but I knew I needed at least a small border on each end. I just happened to have some books covering my coffee table (and spilling off onto the floor but that's another story), one of which was this one:
Which contains a whole section on edgings. In it I found this sweet little edging:
It's super easy and super fast and super cute. 
Now I just need to block it-just an easy block and I'm all set for fall. 

Saturday, February 1, 2014

Can't Stop

 I just can’t stop starting new lace projects.  Two of them have been on the list for a long time and one just popped out a couple of nights ago.

A little over a year ago I got hold of a Spanish lace magazine called, La Encajera.  In it was a pattern for a bobbin lace fan.  It was really beautiful but it was also composed of elements that I knew how to do – individually, at least.  The challenge with it was that there were absolutely no instructions.  There was the pricking and a good photo but no clues as to how many pairs of bobbins, not to mention how to hang them, start off or anything else.  For a long time, I knew it was beyond my skills so I prepared the pricking, ordered the thread and waited for the right time.

It seems to be the right time now so I shrunk the pricking to match the thread I wanted to use (a nice linen thread) and got everything started.  If I just work slowly and pay close attention to how each element interacts with its neighbor, I should be okay.  I’ve only had to take out part of it twice so I think this is pretty good progress.

The second project was one I thought about last summer as I was in the process of buying the house.  I wanted something of my Glasgow heritage to be represented in the house but wasn’t sure how I wanted to do it.  After I did the Victorian Lady piece for Jane, I realized that this was the perfect style to work a piece based on the symbols and emblems that make up the coat of arms of Glasgow. 
 
All based on:

 There’s the tree that never grew,

There’s the bird that never flew,

There’s the fish that never swam,

There’s the bell that never rang.

 All of these are based in legends that you can read about here.  I took my representation from a photo of light post found in the city.

I’ve started but am prepared to go through a bit of trial and error to make sure to get something that will take pride of place over the mantle.

Finally, I had a crazy idea a couple of nights ago.  I had brought up a handspun skein of yarn from the basement that I was trying to decide what it wanted to be.  I had a lot of fun spinning it but I only had 1 skein of chunky yarn that wasn’t super soft and I wasn’t sure what to do with it.  I’d brought it up and dug out some needles, assuming I would be knitting something.

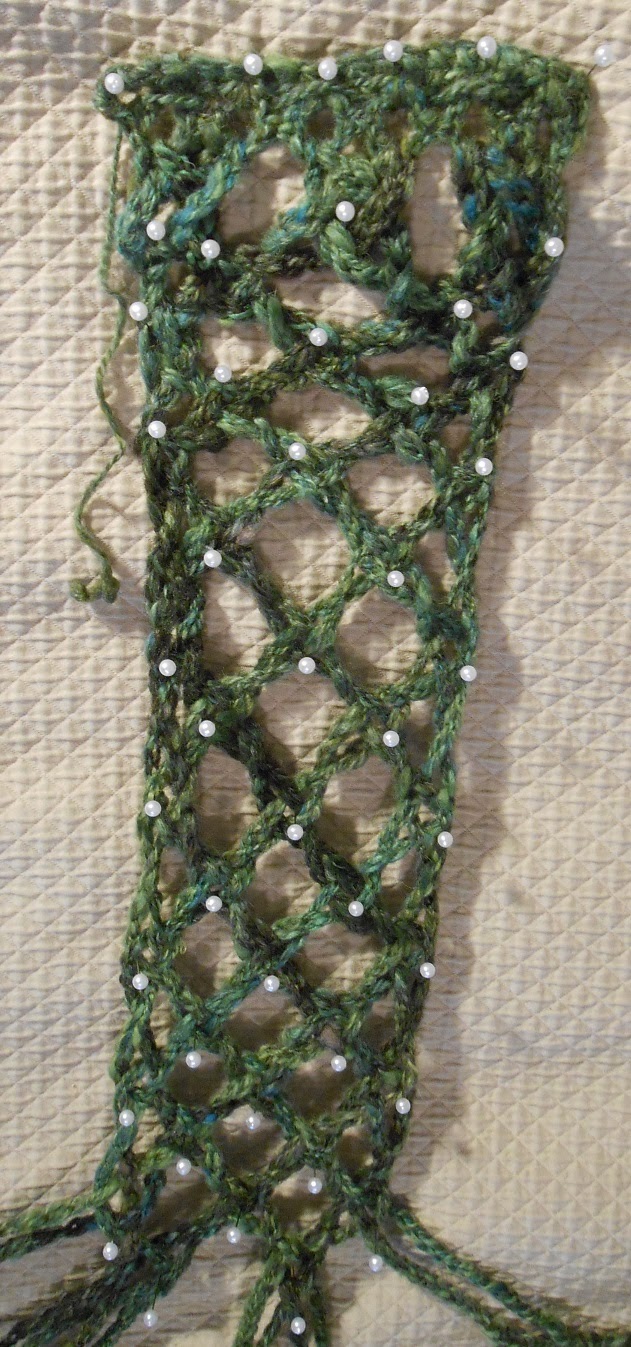
Who knows how these things happen but I looked at it and thought, “I wonder if I could use this to lace a scarf?”  Sure I could but how would I do it.  Although it was pretty chunky, I felt it needed a little more bulk so I decided to crochet a looooooong chain and use that for the lacing.  So I made a base and then crocheted 6 pairs of chains.  At first I thought I would need more but after thinking about it a little, I decided that any more would make it too bulky so I left it at that. 


A couple of unknowns were:
  • How long should I make each chain?  I just made them long and tried to make them roughly the same length.  When I finished the chain, I only loosely bound it off – I figured I would need to adjust the length at the end of the day.  Actually, I was pretty sure I would need to add to the length (I didn’t) but this would work either way – to lengthen or shorten.
  •  Where would I do the lacing?  I wasn’t going to make an actual pricking so I thought the bed would be plenty long for working it.  It was enough but not plenty.  When I reached the end of the bed, I finished.  Plus I had only 1 of my large pins left.  It was long enough.
  • How would I finish it off at the end?  I ended up making a similar placket to what I’d begun with and tied the chains onto it.  The yarn ends were worked in with a needle but it needed more.  I decided to go with a plaited fringe.  I think it needs some large beads added to the fringe area but I didn’t have what I wanted on hand and it’s a freezing sheet of ice on the roads outside.  Beads can always be added later.
 
It was a fun project and gave me tons of ideas for some funky projects I could work in a similar manner. 

Thursday, November 28, 2013

Catching up

Things have been so busy this year that I've been really inconsistent with posts.  But now that I've got a little time off, not only am I going to post, I actually have things to post about and have time to take the photos.

First.  Natural color fair isle sweater.
One of the projects I've had on my plate for a while now has been spinning yarn for a fair isle sweater using natural wool colors.  Quite a while ago, I finished a large hank of chocolate colored wool (which, of course, I can't find now but it will turn up).  Just this past week or so, I've finally finished 2 other of the colors.  I thought I would use a natural white for the background color and an Ashland Bay "Apple Green" color for the "pop" of color.

 The 2 skeins are the ones I finished this week, the brown and the white are the fiber for the other yarns and the green is the apple green.  I've got almost 2 full bobbins of singles of the white finished and about half a bobbin done of the green so I'm not all that far off.  Of course, the freezing weather is giving me a lot of incentive to get the yarn finished so I can get started on the sweater. 

Another project I got finished was a cloud of fiber I bought recently at the Bishop Hill Spin In from Fae Ridge Farms in Iowa.  I've done a number of these clouds from her.  She uses a number of types of fiber, each of which takes the dye differently and she adds some interesting highlights to give the spun yarn a lot of depth and texture.  See what you think:
It didn't make a lot of yardage but I'm interested to see what it will decide it wants to be.  This is one of those yarns with an opinion.  It's completely useless to try to decide what to make from it because it will only be what it wants to be.  Once it makes up its mind, though, watch out!!

And finally, this.
A friend of mine told me a few weeks ago that he wanted a scarf for the cold weather so when I was looking through the stash and found this yarn, I decided it would be perfect for him.  It's Elspeth Lavold Silky Wool in 2 shades of gray.  But I wasn't sure what pattern to use.  That's when it's time to go to the stitch dictionaries.  I knew I wanted something that would be reversible and something I wouldn't have to worry about having a pattern in front of me all the time.  When I came across this pattern, it just reminded me of the number of knitting geniuses there are.  It's simple and elegant and here's what it is:

Row 1:  Knit 3, purl 3 across the row.  It's a 6-stitch repeat so I cast on 48 stitches.
Row 2: Knit 1, purl 1 across the row.

Repeat the 2 rows.

That's it.  That's absolutely all there is to it.  It allows for a nice transition from color to color, it's reversible and it's an interesting texture.  What more could a guy ask for?  Right?

Now I'm off to keep knitting and to finish the flax I'm spinning for a friend and to finish the white for my sweater.  Of course, it would be nice to find the dark brown, too.

P.S. The project bag is from my friend, Karen at Karen Poulakos Studios.  If you're anywhere near Arkansas, she'll be at the Arkansas Fiber Arts Extravaganza on December 5-6.  She's got some great project bags, knitting needles and other fun stuff.

Sunday, July 24, 2011

Things have been quiet here on the blog but that's about the only place there's been any quiet around here.  I won't bore you with the non-fiber portion of life except to say it's trying to take over.  I'm trying to put up a good fight but I'm not entirely sure I'll win.

I have been able to make a little progress on some projects and have even finished a few.  Well, one.

This is the silk, merino, cashmere lace weight I spun on my Ashford drop spindle.  I didn't have too much of it so I ended up making this little neckwarmer which I loved so much that I hated to give it away.  It was like air.  Love it.

I did manage to make a little progress on my Tour de Fleece project (although I'm pretty sure the Tour de France is probably over by now - I haven't even had a chance to check).  I'm processing a Polypay fleece.  I finally got about half of it washed and this morning was able to start carding it up:
All those beautiful little rolags!  I've started the spinning but haven't gotten very far.  I'm spinning it long draw and have a feeling it's going to be lovely and light and wonderful.

Monday, November 29, 2010

Better than expected

Sometimes when you get a bump of roving, you have a very clear picture of what it will look like spun up and sometimes, not so much.  I bought some roving at the Bishophill Spin-in a couple of months ago and really loved the colors.  I spun a little sample and andean plied it to get an idea of what it would look like.  To be honest, it looked like vomit.  The mixture of colors was horrendous up against each other and I was so disappointed because I'd bought 2 bunches of it.  Nevertheless, I spun the first bunch and decided to Navajo ply it to keep the colors together.  Much more better.

I love this pattern for a scarf and I thought it would show up the colors well.  I'm so pleased with how it came out, especially after the first experiment.  Just goes to show, first impressions are necessarily the truth.

By the way, this scarf is easy, peasy and makes a great long scarf.  This yarn is worsted weight, 3 ply, and I'm using size 8 needles.  Cast on 15 stitches and knit a couple of rows in garter stitch to get started.  On the next row, knit 1 and wrap the yarn over the needle 2 times (3 times if you want the inbetween section to be longer - with worsted weight I think 2 is plenty but you can wrap more if you use a smaller yarn).  Repeat these 2 stitches to the last stitch, then knit 1.  On the next row, knit the knit stitch and drop the wraps.  Repeat to the end.  Knit 2 more rows.

Just keep going like this until the scarf is long enough.  I like to add a fringe to finish off the scarf.

Something else I worked on during the long weekend was more of this Blue-faced Leicester.  A while back, I spun 4 oz of this roving on the wheel but I also wanted to spun part of it with the spindle to see how it would compare.  I've been spinning it with an Ashford top-whorl drop spindle and am getting it superfine.  I've done enough for one skein but I've got a ton more on the bobbin ready to ply and I've got a fair bit to spin yet.


I also added 2 more skeins to my white on white project.  Lesson in silliness, really.  I'd spun a bobbin of cashmere (or angora - I'm not sure which but it's one or the other) and had a second bobbin to spin before plying.  It was only 1/2 an ounce (although in this fiber, it's really quite a lot).  Feeling quite pleased with myself, I started plying.  You can't imagine how soft unless you've felt it before.  Anyway, there I was all proud of myself and plying.  Until I realized something was wrong.  Very wrong.  It took me a little while to figure it out but there I was proudly plying a z ply and an s ply.  Wrong. 

That's definitely a lesson in how the proud have fallen.  There was no rectifying that mistake and there was no getting more of the fiber.  Drats.  Drats.  Drats. 

I walked around the apartment kicking myself and while I was walking, I spied with my little eye a bobbin of merino/silk that I'd spun up.  It was some of the KnitPicks fiber that I'd gotten to test out and there it was just waiting.  I wasn't sure which direction it had been spun but I was sure to be able to use it with one of the bobbins!  Ha!!  Sure enough, it worked and I navajo plied the other bobbin, giving me 2 more skeins!

It's adding up but I still have to figure out how I'm going to put them together.  Hmmm....

Saturday, January 3, 2009

Happy New Year

I’ve been working to get the kid’s afghan finished so I’ve been knitting flowers, leaves and

yes, a bunny. This is the bunny that lives in the hole on the mountain in the land of afghan. I can’t stop giggling every time I look at him. He’s just so flipping cute!

This bunny was actually my second bunny. The first bunny looks like a wee alien so I decided to go back to the drawing board and this is the result. See his little tail? I finished him (it’s always the face – once you get the face on it takes on a personality of its own) and just couldn’t quit giggling. I love a bunny that can make me laugh.

Another fruit of my recent research into 19th century patterns is this scarf.

I found the stitch pattern in one of the Godey’s patterns and like the look of it. The stitch looks old fashioned but the Berroco Ultra Alpaca in the denim color brings it up to date. I thought the tassels gave it just the right finish. The stitch pattern is kind of architectural and the tassels seem to set that off.

I’m almost finished with the kid’s afghan but I it’s missing something in the sky section. I’m thinking about what will fit the bill and looking for some Vanna yellow. Maybe a nice bright sun will do the trick.

Sunday, November 16, 2008

Another experiment

The Yarn Harlot had several posts about how she hadn’t done this popular scarf pattern because ‘everyone is doing it.” She finally broke down and let herself follow the crowd and was enormously pleased with the product. The scarf, however, uses Noro Silk Garden and will cost about $40. For me, now the stand back wasn’t about the fact everyone was doing it but the cost. I’m sure I’ve spent a crazy amount of money on projects like this but I spent it before I realized it, not going into it knowing I was spending that sort of money.

So I pulled out the old ‘what if’ and came up with this:

I just love it! And what did it cost? A skein of yarn from my stash that I think was about $7. Yes, just one skein and not all of that!

I followed the pattern of the Noro scarf which is a simple knit 1/purl 1 ribbing, which makes a lovely thick, double-sided fabric, and knitted on. I cast 34 stitches (I think) on US size 8 needles with
Berroco Ultra Alpaca and worked straight on. I was going to use 2 skeins and make it a long scarf but as I got into I realized it was quite wide and thick so I wasn’t sure it would be that great as a long scarf. So, what if I just made it a short scarf with a button hole which would hold the scarf securely while it’s on? Ha! Just what the doctor ordered and I love it. In fact, I’m going to wear it today. Just because I can. Ha!

Monday, November 12, 2007

From anywhere...and anytime

Inspiration also comes at the weirdest times. Sitting in church the other morning, I was looking at the stained glass and the column shapes and happened to wonder what a certain stitch pattern would look like. At first I thought it might look good as a summer top but then I wondered what it would look like as a scarf. When I got home I did a quick swatch and fell in love with it. In St Louis a couple of weeks ago I bought some beautiful yarn that I thought would work great. Actually, the yarn was bought for a scarf for my Mom for Christmas (sorry, Mom – you can have the pattern!). Here’s what happened! Easy and cute, what’s not to love? It still needs to be blocked but I love how it looks. Here's a picture of the scarf and a close-up of the stitch pattern.