Friday, November 27, 2015

What to do with fractal spinning

I'm in the middle of an experiment with fractal spinning.  Check out this post for what that means, in case you missed it.  I finished the spinning last night and got the skein washed so it now looks like this:
Pretty but to me it's hard to tell any difference between this and any other plied yarn spun any other way.  Maybe after it's knitted, I'll be able to tell the difference.

So I started knitting.  Again, it's kind of hard to tell the difference but I like it nevertheless.

The scarf I started with it is 43 stitches wide and worked in a basket weave pattern.  Because knit stitches are wider than they are tall, I made the stitch pattern 5 stitches wide and 6 rows long.  In case you'd like to knit yourself (or someone else) an interesting scarf, you don't need fractal spun yarn, any good sport to DK weight will do.  I'm using US size 4 needles because my yarn has thicker sections and thinner sections.  For my yarn, these create a nice fabric.

I casted on 40 stitches and worked knit 2, purl 2 ribbing for about 8 rows before I started the pattern.  On the first row of the pattern stitch, I increased 3 stitches across to end up with 43 stitches.

Pattern stitch
Row 1: K2, P2, (K5, P5) repeat bracketed stitches to last 4 stitches, P2, K2
Row 2: P2, K2, (P5, K5) repeat bracket stitches to last 4 stitches, K2, P2

Repeat Rows 1 & 2 twice more

Row 7: P2, K2, (P5, K5) repeat bracket stitches to last 4 stitches, K2, P2
Row 8: K2, P2, (K5, P5) repeat bracketed stitches to last 4 stitches, P2, K2

Repeat Rows 7 & 8 twice more

Repeat these 2 sections until your scarf is the length you desire (or your yarn is almost finished) and end with 8 rows of K2/P2 ribbing.  You'll need to decrease 3 stitches on your last pattern row.

Once its washed and blocked, you'll be able to see the basket weave pattern much more clearly but even if you don't block it, I think it's still got an interesting light texture.

I'm not sure how much yarn I ended up with so I'm not sure how long the scarf will be but I don't think it will be very long.  I think this pattern would work really at any length but I think it would be best as a short or medium length.

Wednesday, November 25, 2015

Trial and Error

Sometimes you just have to keep trying until something works.  That's been especially true with the edging for the poncho.  I don't think I've ever had such a time with a design.

I started the edging with an I-cord that was supposed to be the outside edging but as I worked it, I realized that it was pulling in on that side so that would need to be the side attached to the body.  Fine, no problem.  That would give a nice flow from the body to the edging.

I did a light block on the body and as I worked the edging, I would lay the edging around to see how close I was to getting it long enough.  When I got close to what I thought was the finish, I started attaching the edging to the body so I could knit to the very end and have a nice tight finish.  But when I  got to the end of the edging, it looked like it was way short.  What?!

I thought the edging I had should have fit almost all the way around but I kept knitting, adding another 8 inches or so until it went all the way around.  Great, right?  Well, great until I tried it on and found that the edging was all wavy.  Arghhhhh!!!!!

I then had to take the edging completely off (about 110 inches of edging, by the way) and re-attach with better spacing.  Once I did that, I then had to rip out about 6 inches of the edging that I'd knit before, taking into account that I needed to make the braid from the beginning flow into the braid at the end.

Done.

Good.  Now I needed to figure out what to do with the outside edge to finish it off.  It was really rough so I decided to crochet around the edge to give it a little form but it needed something else.  I only had part of one skein of yarn left so I had to be a little careful.  As an old crocheter, if all else fails, use a shell stitch.  So that's what I did and it worked perfectly.  Here's the final product that is worth all the hassle of making sure it was right in the end.

 
Of course, it ain't over till the blocking's done.  Sometimes it makes all the difference.

It ended up being the perfect length and the perfect circumference.  Some of that was guess work and some of that was experience and some of that was pure old trial and error.

Monday, November 23, 2015

Spinning Fractally

I've had a fascination with fractal spinning since I first heard about it.  The idea is that you can prepare your dyed fiber in such a way as to create different lengths of color repeats that create interesting effects when plied together.  The fascination is in the mystery of the math, I suppose, in the way a mathematical idiot is drawn in by the magic of the unknowable.

What??!

Let me 'splain.

If you have a length of dyed roving, you can split it in half.
 
Half will be spun in one long piece, making the section of each color very, very long indeed.
 
The other half can be done in different ways from what I've seen.  The way I did it is to split the second half in half and then half of that in half again.  I started spinning with the smallest strips and then the wider strip and then the wider strip.  So there was a 1/2, a 1/4, a 1/8 and 2 - 1/16 size strips.  I started with the 1/16 strips and worked my way up.


My first bobbin was the many strips with longer and longer color repeats.  The second bobbin will be the first half strip with its long repeats and then I'll ply the 2 bobbins together. 

I have no idea how it will turn out but we'll find out soon.

If you want more information about fractal spinning, see the blog post from Roving Crafters here
 

Wednesday, November 18, 2015

Quick update

I did a quick measure of the circumference of my poncho and I'm going to need, roughly, 110 inches (9 ft 2 in) of edging. 

I've done 16 inches. I have 3 full skeins and still probably a third of the one I'm working on. I actually feel much better now about having enough to finish. 

Wait. Forget I said that. 

By the way, for an easy way to measure things like this, I took a ball of linen yarn (so it won't be stretchy) and traced around the outside of my poncho. At the end I cut it off and then I measured the string with my metal tape measure (again so I don't have any stretch). 

Now I have the yarn to keep with my edging to measure against. I haven't fully blocked the poncho but at least this will get me close and I'll finish the edging once it's been mostly attached so that it lays right. 

Monday, November 16, 2015

The Edging (dum, dum, duuuuummmm)

I've made some progress on the braided cable poncho.
Front:
With its giant 15-stitch braid.
And the Back:
With its braided motif. The cable around the neckline is knitted but not yet stitches down, in case it doesn't look right to you.  It's not right yet but it will be.

Looks pretty far along, right?

It's actually not so far as you'd think because there is still The Edging. 

Anyone who has knitted an edging around a shawl or doily or any other article will understand the physical and psychological blow The Edging inflicts. 

You've got this whole garment which has many, many stitches and has used much yarn. In my example here, I've used 8 1/2 balls of yarn. That's over 1,000 yards of yarn. If you were a newby, you'd be thinking, "I've got this.  This is easy. Almost done."

But I am not a newby and I know that, even though my edging is narrow, the 3 1/2 balls I have left to make this edging may very well not be enough to go around the entire circumference of the poncho. 
It's just a few innocent stitches of background, a narrow i-cord to make a nice, finished edge and a simple little 6-stitch braided cable. What could be easier?

So the question to be answered is, "Will 427 yards of yarn be enough."  At this stage, it's anybody's guess. Stay tuned as the adventure continues. 


Saturday, November 14, 2015

Figuring stuff out

I've got to the back of my braided cable poncho and started the Celtic knit motif.
I found a photo when I was searching for a pattern and this is my attempt to recreate it.
I'm about halfway through the pattern and I think it's going to work out. Sometimes these things are a little trial and error but so far so good. I don't want to but I can rip out with the best. Lots of practice, me. 😉

I was going to have the back straight across but I've decided to make the point to match the front. The decision is purely practical - I don't know if I'll have enough yarn otherwise. I still need to make the border and certainly don't want to run out of yarn on that section. Being last year's purchase, I'm pretty sure I'd never find another skein in this batch. 

I'm off to finish another row or two…

Friday, November 6, 2015

Braids galore

I've started work on my first personal knitted item in quite a while. I've been tied up preparing and conducting classes and so haven't had much to share (except that in pulling material for my cotton spinning class, I found my long last tahkli spindle - yea!!). What spinning I've been doing has been for gifts that I don't want to post for fear the recipient will see it. So that's left me very little to post.

Now, however, I've got a really fun design project going on. It's a cabled poncho that is going to have a pointed front and a square or rounded back (haven't made up my mind just yet on that part. 
It will also have a wide-ish cabled edging around the outside to finish it off. 
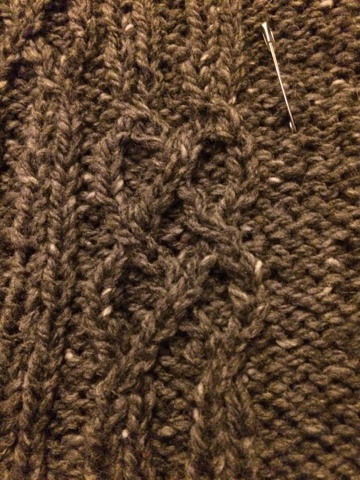
I've used the chunky braided cable up the middle and a narrower stepped braided cable up either side of the middle braid. 
I am really pleased with the way it's laying out. 

This is actually the second version. I got about halfway to this size with my initial attempt and didn't like it at all. It didn't lay right and I just wasn't happy so out it all came and, using lessons learned, I came up with this. 

If you're wondering about the safety pin, I'm using it to keep track of which side of my braided cable I'm twisting.