You've heard of the 3 Tenors, now let me introduce you to the 3 Cardis.
You've already met the Red Palm Bohus taking center stage here. She's being made from merino and bluefaced leicester handspun yarn and is now on the round and round and round never-ending stockinette in the round stage. It would probably be considered boring if it weren't for the yummy softness of the merino yarn.
To the Red Palm Bohus' right, please welcome the Nashua Handknits Creative Focus Fibonacci Cardi. This is yarn I bought at Athena Fibers in Sioux Falls, SD, a few years ago. When I bought these wonderful colors (worsted weight single ply 75%wool/25%alpaca), I bought them for the express purpose of knitting a Fibonacci stripe sweater from them. Every time I've seen them in my stash, I've reminded them that one day they would become a wonderful, happy Fibonacci striped sweater. The day has finally arrived.
I know the tube above doesn't look like much now because it will have to be steeked before it becomes a cardigan but just you wait. I realized I needed to steek it at the point I realized that the nature of Fibonacci means that I would have odd numbers of rows every other time and there would be no way of syncing the working ends without either steeking or having to work in a thousand ends. Naturally, faced with that choice, steeking was a no brainer. I don't have a pattern for it but the plan is to knit for a little while longer (I'm about 2 inches past the armhole shaping) and then set it up for saddle shoulder sleeves and a crew neck. It's all part of the adventure.
The great thing about this yarn (other than it's obvious fabulousness) is that it's fairly chunky and is knitting up super fast.
And last, but definitely not least, on stage left, is the Kauni Cardi. This pattern made the rounds a couple of years ago and I found it interesting but I always fall into these things late in the game so I've just started mine. Actually, I started it a couple of months ago and got most of it done really quickly. For some reason, I've stalled on the second sleeve and just need to get my butt in gear and get it finished.
I find this pattern fascinating because it uses two multiple color (honking big) skeins of yarn. Same yarn but you start at different points of the colorway so you're only ever working with 2 strands of yarn. The color effects come from the changes in the colors in the yarn. Isn't that a great effect?
If you choose to work this pattern, be prepared to have to fill in a lot of blanks or just kind of go your own way. The pattern is, at best, just a sketch of what you will do. But for this sweater, it's worth the effort.
Knitting and more...spinning, beading, crochet, tatting, bobbin lace, tambour, watercolor....
Monday, December 19, 2011
Tuesday, December 13, 2011
See what you think
After delays created by the need to spin more of 3 of the colors (and ply and wash and dry) and the sheer number of stitches (430 or so), I'm almost finished with the yoke of the bohus cardi. I love the colors and the effect but it's come out much more dense than I expected and I'm not sure I'm going to like that. The shaping looks a bit weird here but that's just because it's not blocked out yet. I've decided to keep going for a little while to see how it's going to work out. The rest of the sweater will be the red that you see in the collar.
I can't say I'm enamoured of the way the pattern is written but I'm a big girl so I'll get it figured out (or at least make something up!).
Tuesday, December 6, 2011
Just Gotta Show Someone
After buying the book, Poems of Color a few months back, I've had a plan to knit a bohus sweater. But I decided I wanted to spin the yarn for it. The pattern that took my spinning fancy was called the Red Palm. Even though the pattern was geared more to the pink side of the color wheel, I'm not so much of a pink girl so I wanted to do something more with to the orange/yellow side. That led me to combine a color study I wanted to do with the project of spinning the colors for the yoke of the sweater. See here.
Next on the plan was to spin the red merino top from Ashland Bay. About 800 yards of fingering weight 2-ply yarn was completed and, although not enough for the whole sweater, I thought it would be a good start. Then I found out it was top down, which allows me the satisfaction of seeing the yoke come to life to support me through the long days of knitting a mile of stockinette. Granted it will be red merino stockinette but nevertheless the fascination of the yoke will help the journey.
The other night I finally got started down that road and here's what I've come up with:
You can see the pattern as displayed in the hat pattern, although each bohus pattern in the book contains a pattern for a jacket, a sweater, a cardigan and a hat. I'm making the cardigan. You might need to click on the photo to see the color blends a little better but I'm really pleased with the effect so far and you can see my colors floating around there in back. I love the way the strategically placed purl stitches do to add texture to it. Add to that the "texture" of the not very well spun yarns and it's all I could have hoped for.
(Just a word about the less than perfect yarns. They started out as a color study where I carded varying amounts of white, yellow, red and black yarns to make the gradual color changes. I'd never done very well at long draw - which is what you generally do with rolags - which are what come off hand cards. Add to that the fact that the yarn used was blue-faced leicester and merino - both longer stapled wool - which isn't as conducive to long draw. It was a recipe for uneven yarn - even though I really like the effect in this project - and I've learned tons and did a way better job on the red merino.)
It's not something at this point that I can sit and work on for hours because the yoke is knit on size 1 needles which makes a dense fabric for the yoke but is a little hard on the fingers. Like any kind of colorwork, though, it's mesmerizing to see the pattern develop. Once I get through the yoke I should be able to work through the rest of it pretty quickly. After all it's just stockinette with red merino.
Friday, December 2, 2011
My Favorite
I know you're not supposed to have favorites but this hat and scarf are my favorites of all the ones I've made this year. This started out as part of the attempt to knit my handspun stash. The yarn is handspun from the cloud (a type of fiber preparation, for the unitiated) from a mix of alpace, silk and merino wool that I bought several years ago. I love the gradations of the yarn and it's really, really soft.
Anyway, I started the scarf just using a little lozenge pattern I found in a book somewhere. I don't even remember which pattern or where I found it because I started it QUITE a long time ago. I got tired of knitting the scarf so I decided it was long enough and I was finished. But I still had half a ball left. What to do?
At the time, I was in the middle of the great hat fever of 2011 so it seemed logical to make a hat to match the scarf. Nothing could go with that, right? Actually, for once, that was right and I threw some stitches on the needles, and started knitting. Like anything that you do by instinct without thinking too much about it, it ended up fitting perfectly. I made it extra long so it would slouch a little and when I got to the end, I decreased over 3 rounds to make it bunch up at the top and there you have it:
I wasn't that excited about the scarf until I remembered that it was, indeed, a lace pattern that would not be harmed by a little blocking. Classic duck to swan transformation followed and now I love it. I suspect that I'm going to wear these every day. No matter how many hats or scarves I may have now or in the future, none of them can hold the candle to these. The standard is now set.
If you're interested in a quick and dirty pattern, here goes:
Scarf
I think I used size 3 needles and my yarn is fingering weight (more or less) so you'll need to work that out for the yarn you use, especially for the hat. Sorry, the needles had already gone back into the stash before I though to write this down. I didn't really work out a gauge (which is why this is "quick and dirty") but the best I can tell is that the ribbing on the hat is about 6 stitches to the inch.
Cast on 50 stiches and knit in seed stich for 6-8 rows (or however many you want).
For every row, there's a border of 5 stitches knit in seed stitch. I won't repeat that on the rows below but you'll know to just do it. (Seed stitch is just knitting K1, P1 across the base row and then on each subsequent row, you purl the knit stitches and knit the purl stitches.)
(Pattern is a 6 stitch repeat)
Row 1: 5 border stitches in seed stitch, yarn over (YO), *SSK, K1, K2tog, YO, K1, YO* Repeat from * to * to last 5 stitches, do the 5 border stitches.
Row 2 and all even rows: Border, Purl to end, border
Row 3: Repeat row 1.
Row 5: Repeat row 1. How many tmes you repeat row 1 will determine how long your lozenge is.
Row 7: Border, *YO, slip 1, knit 2 together, pass slipped stitch over, YO, K3* Repeat from * to * to last 5 stitches, border (this is a transition row)
Row 9: Border, K2tog, *YO, K1, YO, SSK, K1, K2tog* Repeat * to * to last 7 stitches, K1, SSK, border.
Rows 11&13: Repeat Row 9.
And so forth until it's as long as you want. Do remember that with this lace pattern, it will block significantly longer than it appears. I would say mine extended about a third again longer.
Hat
I casted on about 108 stitches and knitted about 2 inches of K2/P1 ribbing before starting the pattern.
I worked the above pattern until the hat reached about 9 inches from the beginning and then I decreased this way. The lace pattern is basically in sections of 3. So on the first round of the decrease, I slipped 1 stitch, knit 2 together and passed the slipped stitch over. Then I knit a round plain. Then I knit 2 together all the way around. Then I cut the end and used a darning needle to thread the tail through the remaining stitches, pulled them in and I was done. Usually when I pull the yarn through the stitches like this, especially here where it's a pretty drastic decrease, I use the needle to thread the yarn through several times just to strengthen it. After that, you just work in the ends as per usual and you're good. Here's a shot of how the top is gathered.
I blocked the scarf but not the hat. I like the way the hat fits so I don't plan to block it. You could do, though, if your hat seems too snug. Enjoy!
Tuesday, November 29, 2011
Better than expected
Just a short note to say that I've ended up with just about 800 yards from my 3 bobbin and mighty pleased I am at how it's come out. It been washed and rinsed and is hanging to dry now. I'll post pics of the finished stuff and the sample that comes from it once it's dry. 800 yards! I'll probably only need about 400 more. No worries.
Monday, November 28, 2011
Nothing like a bloom
There's nothing like coming home after a hard day of work and seeing this greeting you on the way in the door:
I brought in several of my plants when it started getting colder. This one hadn't bloomed for quite a while but now it's got several new little growths and blooms ready to pop. It was so cheery to be greeted by this little guy.
While I've not been accomplishing too much, I've managed to get a good little way on the main yarn for my bohus sweater.
This is a red Ashland Bay Merino wool that I've been spinning at a fingering weight. Once it gets washed it should be just right for the cardigan. I'm hoping this lot will get me at least 5-600 yards along the way. I started swatching this weekend with the first skein I spun a while ago. Maybe I'll be able to get it started this weekend.
Sunday, November 20, 2011
And So I Do
I predicted in the last post that, since I loved the singles and wasn't so crazy about the skeined yarn, that I would love the knitted product. It's been really difficult to get a picture that really shows the color in the socks. For some reason, the striping showed much more definitely in the picture than in real life but here goes:
The first two photos were outside and the third inside. The last shows the colors a little better but makes the poor little sock look deformed because it's propped up against the skein. Anyway, you get the idea.
This was an unusual yarn for me to use for socks, being a little bit thicker than I would normally use and being a littel more tightly spun than I've used in the past. The colors remind me of the beautiful colors in the Lion Brand Homespun yarns, the one every beginner buys because the colors are so rich and beautiful and which every knitter who's ever worked with it curses because it's so splitty and hard to knit with. It has those same rich colors that blend so wonderfully.
Fortunately it's much better to work with. I was worried at first that I wouldn't have enough for a whole pair of socks. Now, I know there are ways to split the yarn out so you work all you've got for one and have the same amount for the second. Too fiddly. And you can knit them from the toe up, two at a time, and know you're going to have enough. I don't like knitting toe up socks.
I began by making the cuff really short thinking that I could always add to the top, if needed. But someone at knit night commented she thought they were too short (and I agreed, although I didn't admit it at the time). But as soon as I got home, I ripped out what I'd done on the heel (fortunately just the heel flap) and made the cuff a little longer. As someone else said that night, you can always make the toes a different color and who will know.
Now I"m at the stage, having finished the heel in the second sock, that I think I'm going to have plenty of yarn. But I know enough about life to know that by the time I get to the middle of the foot that I'm going to start monitoring my remaining yarn and be convinced that I'll never be able to finish. So I choose to live in the denial of the moment and believe that I'll have plenty of yarn left over.
In fact, maybe I'll have enough for mittens!
Tuesday, November 15, 2011
Finished yarn
Just wanted to post this pic of the finished yarn. As usual, really different from the singles. I'm not terribly crazy about the barber poling but, based on past experience, I'll probably LOVE the socks. Just don't know when I'll be able to start them.
Monday, November 14, 2011
Bluegrass Weekend
I hadn't planned to spend the weekend with bluegrass pickers but I did and boy did I have a ball. The Friday night concert was fabulous. I love bluegrass music but I don't really know any of the bands or many of the players. There are some that I knew about from living in Nashville but I know a few of the names now. The band that knocked my socks off was Michael Cleveland and Flamekeeper. I can still barely breathe thinking about them. I also saw the mandolin of my dreams. Natural wood, with rounded edges, beautiful tone. Fortunately it was almost $300 so the temptation only went so far!
In fact the concerts were so exciting that I finished a pair of socks, one Friday night and one Saturday night. Of course, the concerts went from about 7pm to after 11:30 and the pattern was plain Jane but I will still pretty amazed at how quickly they came off the needles.
This was wool yarn I'd bought at 365 Days on a Farm in IA over the summer. I bought it particularly to make socks but I cast on about 4 times before I got something I liked. (That was totally on me because the yarn is gorgeous and soft and wonderful.) I'm afraid I can't remember the name of the yarn but I do know it's yarn made in the US because that's all 365 Days carries. I knit them on size 2 needles and even though it really is a fingering/dk weight, it's so lightly spun that I could have used a size 1 needle and not worried.
I've even got a spinning project going. This was 4 oz of blue-faced leicester fiber I bought at Bishophill particularly to spin for sock yarn but once I got the singles spun, I wasn't sure I wanted to lose my yardage. The colors are so amazing that I really wished I had enough for a sweater. Here's the bobbins of singles:
How beautiful is that? But, as you can see, I decided to go for the 3-ply after all. It will be very interesting to see how the various colors play together. Of course, I could have kept the color bands but the changes would be too short and I didn't want to do a Navajo ply for the socks. I wanted a true 3-ply and I think it's going to be very interesting. The singles were spun with about an 8:1 ratio and I'm plying using the 12:1 ratio whorl to see if I can reproduce my recent experimentation results. I'll let you know when I get this washed.
Tuesday, November 8, 2011
Samples away
Spurred on by my preparations for a program for our local spinning/weaving guild, Prairie Weavers, I have been doing a ton of experimentation regarding the effect of varying amounts of twist used for plying yarns (I'm not the best judge, but I think the program tonight went really well, thanks for asking). I won't go too much into it yet because I'm planning on a whole post with pics of my samples, etc. a little later on as I have time to process it. But I did want to show this:
This is 38 grams of a silk/merino laceweight yarn before washing. Before washing, it was 368 yards of yumminess. After washing (for reasons that are plain to those who were at the guild meeting for the program), it was 332 yards of squishy yummi-numminess. Why? All will be made clear when the post about my little experimentation hits the stands. I've found out why much of my laceweight yarn has been just yummy instead of squishy yummi-nummi. It all makes so much sense now!
I've also been working with some of my recently (within the last year) acquired fleeces.
On the left is a sample skein of the bfl/suffolk cross. (By the way, I realized today that I'd misspelled Suffolk all through the last post. I really do know how to spell it and every time I typed it I knew I was misspelling it but I just couldn't stop it.) Next to it is a lock of the fleece. Long staple - not unusual for a sheep with bfl in its heritage. There's still a bit of lanolin in the fleece so I'm working on finding the best preparation for spinning.
On the right is a lock and a sample from the Polypay fleece I got earlier this year in Kentucky. You can see the staple is only about half that of the bfl/suffolk and it has a finer crimp. I really like the sample I spun when I combed the fleece. It's a little more work but I got a much nicer end results. Actually, I only had to do one or two passes with the combs because it opened up so wonderfully. I would love to have enough of this spun to make something to wear when I go to Kentucky next year.
(For those who are interested, this was spun on my Kromski Minstrel - singles on 12:1 ratio; ply on 16:1. Fiber is KnitPicks Gloss roving.)
I've also been working with some of my recently (within the last year) acquired fleeces.
On the left is a sample skein of the bfl/suffolk cross. (By the way, I realized today that I'd misspelled Suffolk all through the last post. I really do know how to spell it and every time I typed it I knew I was misspelling it but I just couldn't stop it.) Next to it is a lock of the fleece. Long staple - not unusual for a sheep with bfl in its heritage. There's still a bit of lanolin in the fleece so I'm working on finding the best preparation for spinning.
On the right is a lock and a sample from the Polypay fleece I got earlier this year in Kentucky. You can see the staple is only about half that of the bfl/suffolk and it has a finer crimp. I really like the sample I spun when I combed the fleece. It's a little more work but I got a much nicer end results. Actually, I only had to do one or two passes with the combs because it opened up so wonderfully. I would love to have enough of this spun to make something to wear when I go to Kentucky next year.
Sunday, November 6, 2011
Best Fleece
I told you about the BFL/Suffolk cross fleece I got a few weeks ago but haven't been able to post any photos yet. This fleece is just beautiful. Every person I've talked to about this cross (everyone who knows that there is more than one type of sheep, that is) has raised their eyebrows about the odd mix. But it's a wonderful fleece and washed so beautifully. And much of that is hats off to the shepherd.
It started drying out on the porch but later had to move indoors because my poor fleece was getting cold. But here's what I was left with.
How great is that?
I haven't gotten too much of it spun because I've been working on some things for the Prairie Weaver's program on Tuesday night (a lot of things) but I did do a little sample spinning straight from the lock. No photos exist because the experiment didn't go all that well, to be honest. So I changed and decided to try to comb a bit of it and see how that worked.
I didn't need more than 1 pass, really, with the combs for it all to jump open so now that I've done my little experiment, I think I can get the rest of it prepared pretty quickly. I spun it fairly thin, although not extremely so because I want to get a finished sock weight (fingering weight) 3 ply yarn from it. Here is the singles waiting to be plied and washed.
I'm very excited to get this working, although it's going to take a lot more attention that just spinning from prepared roving. There's just something so tactile and satisfying about starting from the beginning and getting something to be proud of out of it. It's what I love so much about spinning cotton from the seed. It's basic, elemental and so satisfying to complete the cycle.
Friday, October 28, 2011
More than one way to skin a skein
I’ve started working on a post over the last couple of weeks but just haven’t been able to get everything together at one time.
Then I wound the 3rd bobbin into a ball.
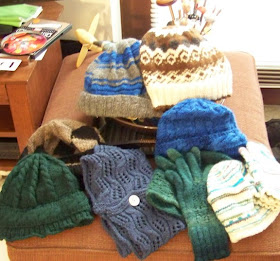
I’m not going to go through the new hats but here’s a picture of the collection. I gave away the alpaca fair isle one to a friend but I’ve got plenty more where that came from so I think there is one more hat in my future but for the most part I think it’s over. For now. Except the one I’ve got going to match the scarf I made with the last of the Kickapoo Creek silk/merino/alpaca. That’s all. I think.
I had a great time once again at the Bishophill Spin-In. There were some unexpected surprises and some intoxicating fibers. The 2 big surprises (no, make that 3) came from a stall run by a couple who were disposing of an estate that comprised 7 storage lockers of crafting treasures. From them I obtained some very rare and exciting bobbin lace books (scoooore!), a Schacht warping board (20 yard warping board that probably cost over $200 for $35) and a bobbin lace bobbin winder (that usually costs more than $100 for $30).
Wasn’t expecting those at all. I’d been pricing warping boards because the only one I have is a small one on the back of my rigid heddle loom. Problem is if I have that loom warped (which I do), I can’t use the warping board.
But, on to the fiber, which is the whole reason for going there. I’ll tell you more about the fleece I got another time but I also got the most beautiful roving from a local farm. The sheep is Blue-faced Leicester. It is the best prepared roving I’ve ever had. It’s from Floya’s Fleece (sorry, no website link can I find). She’s from Chana, IL, and her fiber is fabulous. I got a mixture of white, med brown and dark brown and I’m going to do something special with it. I’m just itching to spin it but I don’t want to be rushed with other things. I want to just enjoy the process.
I also got a fiber mixture from Fae Ridge Farm which I wasn’t at all convinced I really wanted but I have a very pushy friend. Never go shopping with Mary if you don’t have an iron will. I’m just saying. Anyway, I’ve lost the tag that gives all the fibers mixed for this roving but I just wasn’t convinced except I really liked the colors. Definitely not love at first sight but the second I started spinning, I started getting courted. Then I plied and got wooed. And then I washed and I was hooked.
It was in a cloud preparation, which I 'm particularly fond of, and I’ve spun it to a 3-ply almost worsted weight. So far I have about 200 yards with probably another 100 to go and, although the intention was to spin a sock yarn, I’m not sure that’s what this lovely stuff wants to be. It’s predominantly Border Leicester so it’s not totally soft (although it’s really pretty wonderful) and it’s a little chunkier than I would normally have for socks…we’ll have to see.
But the thing I look forward to every year is the dyed silk hankies from Lone Tree Wools. I get them every year and every year they’re the first thing I spin and I can’t wait until the next year to get more.
You know I love to spin hankies. I spin them corner to corner and have posted a video to show how I do it (in case you’re interested). But I’ve discovered that it doesn’t do very well as a 2-ply yarn. I really like it to have 3 plies – gives it a bit of structure. I’ve had this discussion with several friends lately and seem to have some support on this but I’ve never looked up the discussions on Ravelry to see what the wider opinion is. I don’t guess it really matters, it’s my yarn and I’ll make it like it want to.
But this brings us to a dilemma that every spinner faces from time to time. How many plies? After you’ve spent all this time spinning the singles, do you go for the yardage or do you go for the perfect yarn? Of course, with every ply you add, you decrease your yardage by a significant amount. Having the perfect yarn, though…
So I decided on a 3-ply but I didn’t want to do a Navajo ply with this because silk doesn’t absorb that little bump you get at the end of each chain like wool can. I tried to guestimate* how much to spin onto each bobbin and got pretty close on the first 2 but the third bobbin was a lot more. Coulda, woulda, shoulda. It just was.
I tried to figure out how best to do it so that I could spin a true 3-ply off of my 3 uneven bobbins and here’s what I came up with.
I had 2 pretty even bobbins so I left the singles on those bobbins.Then I wound the 3rd bobbin into a ball.
To begin with, I spun with the inside and outside ends of the ball along with one of the bobbins – 3 strands. I continued that until I realized I was going to run out of the ball then I started using 1 strand from the ball with strands from each of the bobbins. I did that until the ball ran out. At that point, I was close to the end but I had about twice as much on one bobbin as I had on the other. So I wound the long bobbin strand on my hand and Andean plied the hand strand with the remaining bobbin strand until I was finished.
It worked out beautifully. Once the strand on my hand was finished, I had about 4 inches on the remaining bobbin. Pretty darn close. Can’t wait to wind this off and get it washed!
The moral of the story is there’s more than one way to get a 3 ply yarn.
* Just a little note to say that an organized spinner would have separated her fiber out before she started spinning so that all 3 bobbins were even to begin with. I had my reasons.
Sunday, October 9, 2011
The hats just keep coming
The hat thing hasn't lifted yet although it is starting to slow down, I think. That's because I'm almost finished with the first skein of red merino so I can start swatching for my Bohus sweater. But while I"m at it...
I had some gray alpaca left over from the hat for my friend's aunt and I had some blue left over from my blue hat.
Bam! How cool is that?! I love this hat. I adore this hat. Alpaca and Blue faced leicester, 2 of the softest, coziest fibers in the known universe. The electric blue against the gray. I love this hat so much that I've been wearing it around the house. I have to take off from time to time because, of course, it's not cool enough yet to wear this hat for real and my head gets too hot. So I take it off until I'm cooled off and then it goes right back on.
Then, for something different, I decided I would make a hat from the Entre to Entrelac book by Gwen Bortner. She's got some cool stuff in the book which I think is worth the effort to understand the patterns and techniques. It is an effort to follow the shorthand used and you will need to refer to 2 or 3 sections of the book at once so keep some sticky notes handy so you don't lose your place but what you get out of it will entertain, intrigue and delight you.
For me, it was the hat pattern that I wanted to try.
The brown is alpaca/merino/silk that I got from Kickapoo Creek Farms that no longer exists. It was such a lovely preparation. Wish I could find more of it. The black was supposed to be alpaca but wasn't. Alpaca would have been better - this isn't nearly as soft.
For the first part of the hat, I used each of the yarns double since it was such a large needle size (for me - US size 7). I don't like it and wish I hadn't done it but by the time I'd decided that, it was too late and I wasn't up for undoing it. So for the entrelac section, although I used the basics of the pattern in the book, I did my own thing and did it with single strands. The pattern called for decreasing stitches down to make six entrelac panels. I didn't decrease; I made eight. The pattern called for just 3 sections, I made 4, repeating the brown for the final section.
To me, that kept the poofy quality of the entrelac and made it a better fit for me. I obviously have a way bigger head than most hats patterns are written for. One really clever thing the pattern did was calling for the sections to be stitches together at the top. I love that feature of the hat. The only thing I decided it needed, though, was the little black section to close up the hole and to finish the hat off. Having just the brown there looked too unfinished. All I did was crochet some stitches around for a couple of rounds and then closed it up. That helped a lot.
I think this is a hugely creative use of entrelac and I will definitely want to do this hat again. Next time, though, I may just go for a solid color all the way through. I think first, though, I need to hit the fiber stash and spin a little more because I've used up almost all my handspun. Mon Dieu, what shall I do?
I know, next Saturday is Bishop Hill Spin-In. Maybe I need some more fiber....
Monday, October 3, 2011
Hat, hats and more hats
And a cowl. And gloves.
First of all, let me reiterate that I'm not really a hat person. I like them but I tend to look pretty silly in them. In saying that, I have no idea why I'm so into hats right now. Can't get enough of the them. Need hats. Need more hats.
Part of the seduction (for seduction it is), I think, is that it's a good project for handspun. You don't typically have tons of yardage out of your handspun unless you're spinning for a particular project and a hat is a good project that doesn't take loads of yarn. But that's always been true and this has only descended on me over the past couple of months. Hummm...
So, here's the latest in the line and it comes with a bit of a silly story.
I saw this pattern in the magazine. But like any lazy knitter, I saw the pretty picture, didn't read the pattern and chose the yarn I wanted to use. I sat down with said pattern and said yarn and needles to go with said yarn only to discover that the pattern called for a worsted weight yarn and US size 6 & 7 needles. Said yarn was lace weight and chosen needles were US size 3 & 4.
Not to worry, the band is made flat, you just repeat the pattern until it's long enough to go around the head. No problem, right? Actually there wasn't a problem with that part. What was the problem is that said yarn was actually this slightly variegated bfl yarn AND another handspun lace weight corriedale in a solid color that I thought would go with it. I made the band, sewed it together, picked up the stitches for the crown with the solid color, knit the crown (only not floppy like this - it was more fitted), finished the hat and decided the colors definitely did NOT go together. They were sort of the same ball park but off enough to set your teeth on edge.
For some reason I didn't want to rip it out so I went back and picked up stitches with the same yarn I'd used for the band and upped the needle size to the size 4 and I finished the crown. Again. What I ended up with was a double layer hat with a lacy edging and I really quite fancy it!
But before I'd even got the hat finished (the second time), I knew there had to be gloves. I love gloves and the lace weight was the perfect weight for good gloves that you can wear and still move your fingers in. So I used my basic glove pattern working in the lace pattern from the hat band into the back of the glove. You can't see it very well in the photos but just look at the hat. It's the same pattern.
The other thing I finished this weekend as I watched the first three seasons of Leverage (which I am totally addicted to, by the way) is the Tilting Tardis Cowl. This was a hugely clever pattern posted on Ravelry by Marilyn Phillippi. She adapted a Barbara Walker lace pattern to look like little Tardises (Tardi?) hurtling through space and time and I just couldn't resist. I'd started this ages ago but it was one of those projects that gets buried in the stash until the proper time. It made it to the surface this weekend as I cleaned and organized the craft room (and watched the first 3 seasons of Leverage) and I had to finish it.
I don't think it was supposed to be big enough to cover the head but after it was washed, it became this size and I couldn't be more thrilled because I do love this kind of option to cover one's head but then be able to drop it around the neck for storage, as it were. I think I'll be wearing this a lot in the coming months.
Tuesday, September 27, 2011
Getting through the pile
A while back I decided to try to start knitting through my handspun stash and I'm finally making a dent. The other thing I've had a hankering for is knitting hats. I'm not really sure why because I'm not a big hat person but for some reason I have this craving for hats. Here's the latest:
You can't see it so well but there is a cabled band around the bottom edge. The advantage of this, which I feel is going to pay off later, is the double thickness of cushy BFL around my ears.
There really is just not enough time to do everything but this is where I'm at on my bobbin lace bookmark:
Some of it has been a little more successful than others but I think it will be pretty. If I ever get it finished, that is. I've got a couple of days off coming up so maybe I can get this finished up and make a dent in my yardage piece. I'm up to 22 inches on that, I think. Or is it 24. But do you think I can find a tape measure? When you only own 15 tape measures, you can't expect to always be able to put your hand on one.
I'm going hunting...
Sunday, September 18, 2011
Bits and Bobs
There's nothing organized about this post, just some things that got started, some things that got finished and some things that are in progress.
First of all, one of the challenges of spinning is figuring out what you're going to do with the yarn and if you have enough for what you'd like to do. A couple of weeks ago, I spun some yarn from batt. I wasn't that thrilled with the yarn but decided I would do a scarf/snood/whatever it came out to be. I cast on in the round and started working up. I decided on the way up that I'd cast on too many stitches so I did some decreases and then started a nice little lace pattern. My mistake in casting on turned out to be a really nice little collar that lays flat across the shoulders. Nice. Once I got to the lace pattern, I decided I would just knit until the yarn finished and then I would stop. Here's what I got:
I'm still not that crazy about the yarn but I've very happy with the final result. The only problem is that it's not quite long enough to cover the whole head. Never mind. It makes a nice scarf anyway.
The second project came out of a conversation I had on Saturday at a birthday party. We were waiting for the birthday girl when I got talking to a lady. In the course of the conversation, we talked about alpacas and how if someone is allergic to wool, they can often wear alpaca. Later in the conversation, we were talking about the cold weather and she made the comment that she looked for a knitted hat last winter and the only one she could find made her itch because it had wool in it. She added that she was always looking for a knit hat with a pom-pom on the top like she had growing up.
Now, as a spinner and knitter, how could I not take up that challenge? It's our goal in life that those lacking in fiber shall have it in the form and manner that would give them most joy. When I got home, I had a look through my handspun stash to see if I had any alpaca that would serve. What I found was a skein of medium grey alpaca singles that I'd spun probably 5 or 6 years ago - 460 yards of it! I decided to go ahead and ply it and then use it for a knit hat - with a pom-pom. I just used a basic recipe for a knit hat and whipped it up. It doesn't yet have the pom-pom because I'm waiting for it to dry but I'm happy with how it came out and I think she'll like it.
This photo is not very good color but it shows the style anyway. You can see the true color in the photo of the snood since it's fitted underneath it on the model. If you're interested in the hat pattern, here's what I did.
With US size 4 needles and a yarn that was probably equivalent to DK or a light worsted, I cast on 80 stitches. I worked knit 2/purl 2 ribbing for about 3 inches. I then changed to US size 5 needles and knit in stockinette for about 6.5 inches more (9.5 inches in all). Once I got it long enough so that it could be turned up at the cuff, I did the decrease this way:
Round 1: Knit 2 together. Repeat around.
Round 2: Knit around
Repeat these 2 rows 2 more times (10 stitches remain)
Cut the thread, leaving a tail of about 10 inches. Using a tapestry needle, thread the yarn through all the stitches twice. I left the tail because I'll use that to help tack down the pom-pom. That's all there is to it. I used double pointed needles but, of course, you could use any technique you prefer.
I have been back working on my bobbin lace projects, too. One of them is an attempt to make an entire yard of a bobbin lace pattern - a challenge instituted by the LACE group I'm in in Chicago.
I've got about 20 inches so far and I feel like a big girl lacer! I'm working on a travel pillow that I made myself using some travel bobbins. Although the pattern is a simple one (as befits my exceedingly amature status), I've had to do things like take out sections where I'd made mistakes, move the pattern on the pillow (which isn't as simple as it sounds) and add new threads as the bobbins have run out of thread.
Sunday, September 11, 2011
Colors
When I was in Kentucky earlier this year, I got a copy of the book, "Poems of Color: Knitting in the Bohus Tradition" by Wendy Keele. I'd heard of this style of knitting but didn't know too much about it. Reading about it and seeing the patterns made me absolutely want to knit one (or 10). The one that intrigued me was one that has a solid color body and a yoke knit with a number of shades of a color, sort of shimmering back and forth through the shades. I'd been wanting to play with blending colors with my hand cards (since I don't have a drum carder) so this seemed like the perfect project.
I decided to do the body in red and do the colors shaded from a yellowish white through to red and back. Seven shades. Like this:
To add to the project, I decided I needed to spin this yarn in the proper woolen manner, which I'm not very good at. The base fiber I used for these colors was blue-faced leicester which I found to be really too long a staple to spin very well from the rolag. You may disagree but keep in mind my lack of experience is a factor here.
I have been practicing other than these skeins with spinning from the fold and spinning from rolags and I think I'm getting better but I definitely need to get some help. When I get some time I need to hunt through YouTube to see some examples of people spinning woolen from rolags because I want to be a little better before I start spinning for the body of this sweater. I reckon I'm going to need at least 1,200 yards of the main red color for the body. Best way to learn is to have a goal, though, so I'm hoping my technique will improve with practice.
Back to the book, the thing I love about this book is that for each of the 7 or 8 styles they have patterns for, each style has a pattern for pullover, cardigan, jacket and hat. I love the flexibility that gives you to explore each pattern. If you want to explore Bohus Stickening (Bohus Knitting) more, start here or do a search on it and see examples of the patterns. Warning: You'll definitely want one!
Saturday, September 10, 2011
It's all a Dream
I had a dream last night. In my dream, I was in a plant room. There were several people there but I don't think I knew them. The lady whose plants they were was playing hostess, answering the various questions about the plants. As the visit was winding down, I found myself asking her questions like, "What's the most unusual way you've obtained a plant?" "Which plant surprises or surprised you the most?" "Which plant gives you the most pleasure?" "Which plant is the most meaningful?"
The questions surprised her and as she started answering them, the plant room, all of a sudden, became more personal. She became more thoughtful and softer as she let the questions take her back to her encounter with each of the plants. She told me the plant she'd obtained in the most unusual way was a little ground plant. As she pointed out a little plant, close to the ground with pinkish, red leaves or blooms or whatever they were, she began to tell me the story of how she was in a cab one day and began to talk to the cab driver, as you do. They got on to plants and talked plants until they arrived at her destination. As she was getting out and paying him for her trip, he reached down into the floorboard, brought up this little plant and gave it to her. He didn't tell her anything about it or why he would have a plant in his cab but he said he wanted her to have it because he knew she would appreciate it.
I could tell that this gesture touched her deeply as her eyes began to moisten. She got hold of herself and continued with her story but I knew that when I asked her which plant was the most meaningful to her, this would be the one she would go back to.
For the rest of the tour through her room and the stories she told me in response to my various questions, she has a deep, satisfied expression on her face. The gift the cabbie gave her that day was working its magic all over again. From that point, too, she was more animated about the history of the various plants, giving the proper and common names for each. (I should tell you that I know nothing about plants and have no idea what names she used - it was probably one of those dream things where I heard whaaa, whaaa, whaa but knew that's what she was telling me.)
I actually remembered the dream when I woke up, although it's fading now, but what I took from it was this. Whatever your passion is, whether it be yarn or fiber, spinning wheels or looms, coins or angels or books, salt and pepper shakers or music or figurines, whatever that thing you have gathered around you, go and pull it out or look around your display cases or pull out your displays, and remember why you started collecting. Really look at it again and remember where you got some of the items. Do they remind you of a wonderful vacation or a dear friend or loved one who gave it to you to feed your passion? Did you just love the colors or the feel of it? Let it give you again, that feeling your first had when you saw it. Was it excitement or satisfaction or humor or love or being loved? Appreciate it all over again.
And if it doesn't give you that same thrill, why not pass it on to someone else and start over with something that you do feel passionate about now, right now, in your life. In the immortal words of Rob Thomas, "No one said we have to keep the things we get." Don't let sentiment hold you back. Keep your fresh passion fresh abd let someone else appreciate the things that once thrilled you.
Monday, September 5, 2011
Plenty o' Cotton
I've finally gotten a chance to spin some of the cotton my Mom grew for me last year. I keep saying that it's pretty astounding to see how much cotton fiber is on one little bitty cotton seed. I spun a handfun (about 200 seeds) of the homegrown cotton. Have a look at this:
This is the 2-ply skein of about 175 yards of cotton and the seeds it came from. Since it was about 200 seeds, that means, on average, there was almost 2 yards of fiber on each seed. Granted that this has be spun pretty finely but still.
The other interesting thing about this cotton is how much silkier it was than the commercial stuff. I tried to get a photo that would show how silky it looked but I just couldn't get it to show up. This stuff was silky and bright white.
This is the cotton up against the while cormo that's waiting to be spun. I hope the color shows up on the screen. LOVE IT.
Thursday, August 25, 2011
Checking in
It won't stay this way long but for a few days, at least, I've got my life back a little. And no one can say that I'm not making hay while the sun shines.
I finished a spinning project:
I don't really like Etsy. I find it hard to navigate and even when I search on a specfic vendor, I can never get it to come up. But I was on the site the other day and came across this listing. Who could pass that up. I've never spun from a batt and wanted to try it out. A batt, by the way, is simply a form of preparation that comes directly off the drum carder in a sheet like this picture shows. The batt was made up of multiple shades of green merino with tons of silk tossed in for good measure.
I can't say it was the easiest preparation I've ever spun from but I know that's totally from my inexperience, not the fiber preparation. I really didn't aim for a specific type of wool and I had no plans for what to make from it. I just let it be. And you can see what it be. I wish you could feel how soft and squishy it came out.
Now that it's here, I think I'm going to do a winter cowl. Size 7 needles or so, a 1x1 ribbing, in the round, just go until it's gone. Yep, I think that will do nicely.
The other thing I've been rocking is my bobbin lace. I've got several projects in process, including a sampler bookmark and yardage of a simple, beginner edging (since I'm a beginner!). The lace group I've been meeting with from time to time over the past 9 months or so, started a yardage club. To gain entry, you have to complete a yard or two yards (can't remember what they settled on - I'll need to check that) of any bobbin lace pattern you want. Takes more time that you might think but it's a great idea to stretch beyond the old comfort zone. I'm currently at about 10 inches and when I hit halfway, I'll get a photo posted here.
The other thing I decided to try is a beginner project that came in my LACE welcome pack. This is also a wonderful idea. When you join the guild, you get an envelope that has information about the guild like the bylaws, etc., a membership list, a vendor list and this little pattern for a bookmark. I'd never had a chance to try it so tonight I got my bobbins set up, the pattern pricked and ready and here's what happened:
Isn't it cute?! I did that. With my own little hands! It's kind of wonky because I made the rookie move of taking all the pins out right away and spritzing water on it to iron. Just like in blocking a lace shawl, you should really let the project sit under the tension of the pins for at least 24 hours. Most of the time I'm pretty good about that, but for this I just couldn't wait! I'll definitely make this again. Only took a few hours and it's a nice little giftie.
Monday, August 22, 2011
Chance Encounter
We have a local auction house that has regular auctions on Friday nights. I don't go a lot but I do enjoy going from time to time. A couple of weeks ago, I noticed on their weekly email that they had a "small loom." That was the only description and there was no picture posted. So, after I got finished at work, I headed over to see what this "small loom" was. I knew the area that it would be in so when I got there I made a beeline to that area but I couldn't see it. I looked high and I looked low. Nothing. Of course, the thought that came to my head was, "Small loom is right!"
I eventually found it hidden behind a basket and it was this:
It's a 9" Dick Blick Artcraft 4-shaft loom. The gleam in this little guy's daddy's eye was a design developed by the Structo Company back in 1922. Initially they were toys but came with all the fixings, including prepared warping spools and an instruction manual written by Mary Meigs Atwater, a most venerated weaver of the time. After World War II, I believe, when Structo had changed it's manufacturing output, the loom was put aside. In the 1970s, Dick Blick (the artist supply place) bought the design and put out its version for a number of years. It's all metal and this one had been sitting around a looooong time. I took it completely apart and cleaned every little piece, put it back together and, Bob's your uncle, a truely portable loom.
The last time I was at Yarn Barn, I bought some blue and white linen because I wanted to do a twill study and I thought that would make it interesting. I don't yet have a proper warping board (except on the back of my rigid heddle loom that was unavailable because it's got a project on it) but I realized tha the old weasel yarn winder I picked up at a local antique mall wound the yarn to 94 inches. Well, I didn't need any more than that, so I just wound the warp on the weasel and got the thing warped right away. I even got my twill study started. (to everything there is a time....)
I'm not a very good weaver and I'm more interested in learning about weaving at this point than about making something perfect, so combining what little I know with this nice compact loom has been a perfect match. It can be stored in the corner and brought out when I have a few minutes to work on the study. Ideal!
p.s. If you want to find out a little more about the Structo and Dick Blick Artcraft loom, click here. And here. And here. And here.
Wednesday, August 17, 2011
Most talented friends in the world
I have some of the most talented friends on the whole planet. Don't believe me? See what my friend, Cindy, made for me:
This is a Russian-style spindle turned using ebony wood. It's so beautiful and elegant and the wood is super dense giving it a good weight. It has such a wonderful feel to it. We believe this is Macassar Ebony which is why it's not black. All I can say is I'm totally smitten. It's beyond what I ever hoped for.
I picked out the wood when we were at a woodworking shop in Champaign a couple of weeks ago and she gave it to me at spin club last night. I fell so deeply in love that I kicked it up last night with some fiber I had on me and got what you see on the green bobbin done just from last night and a little bit this afternoon. If you want to see how a Russian spindle works (from someone who really knows what they're doing with it), have a look at this video from YouTube:
Or this one:
She also made the Navajo spindle I use most often. She's been making the most beautiful spindles and is getting us all started with this style of support spindle. She's getting so clever with her lathe that it's not leaving her much time to spin! or weave. or sew. The price of fame is often steep!
Friday, August 12, 2011
If Fiber Were Liquor
This would be smooth 12 year old Scotch.
Since I don't drink, fiber becomes the stress reliever of choice. Last weekend, in an effort to deal with work stress, I started on this tri-color organic, naturally-colored cotton. The previous picture was prior to washing and this is what it looked like after it got boiled with the washing soda:
The difference in color is more about how the cotton darkens after it's washing that about the difference in photo lighting. 250 yards of smooshy, cushy cotton. Hummm...now, what can I make with it?
While I was busy spinning the cotton, there was something busy spinning other things around here:
Yep, and it was really as big as it looks.